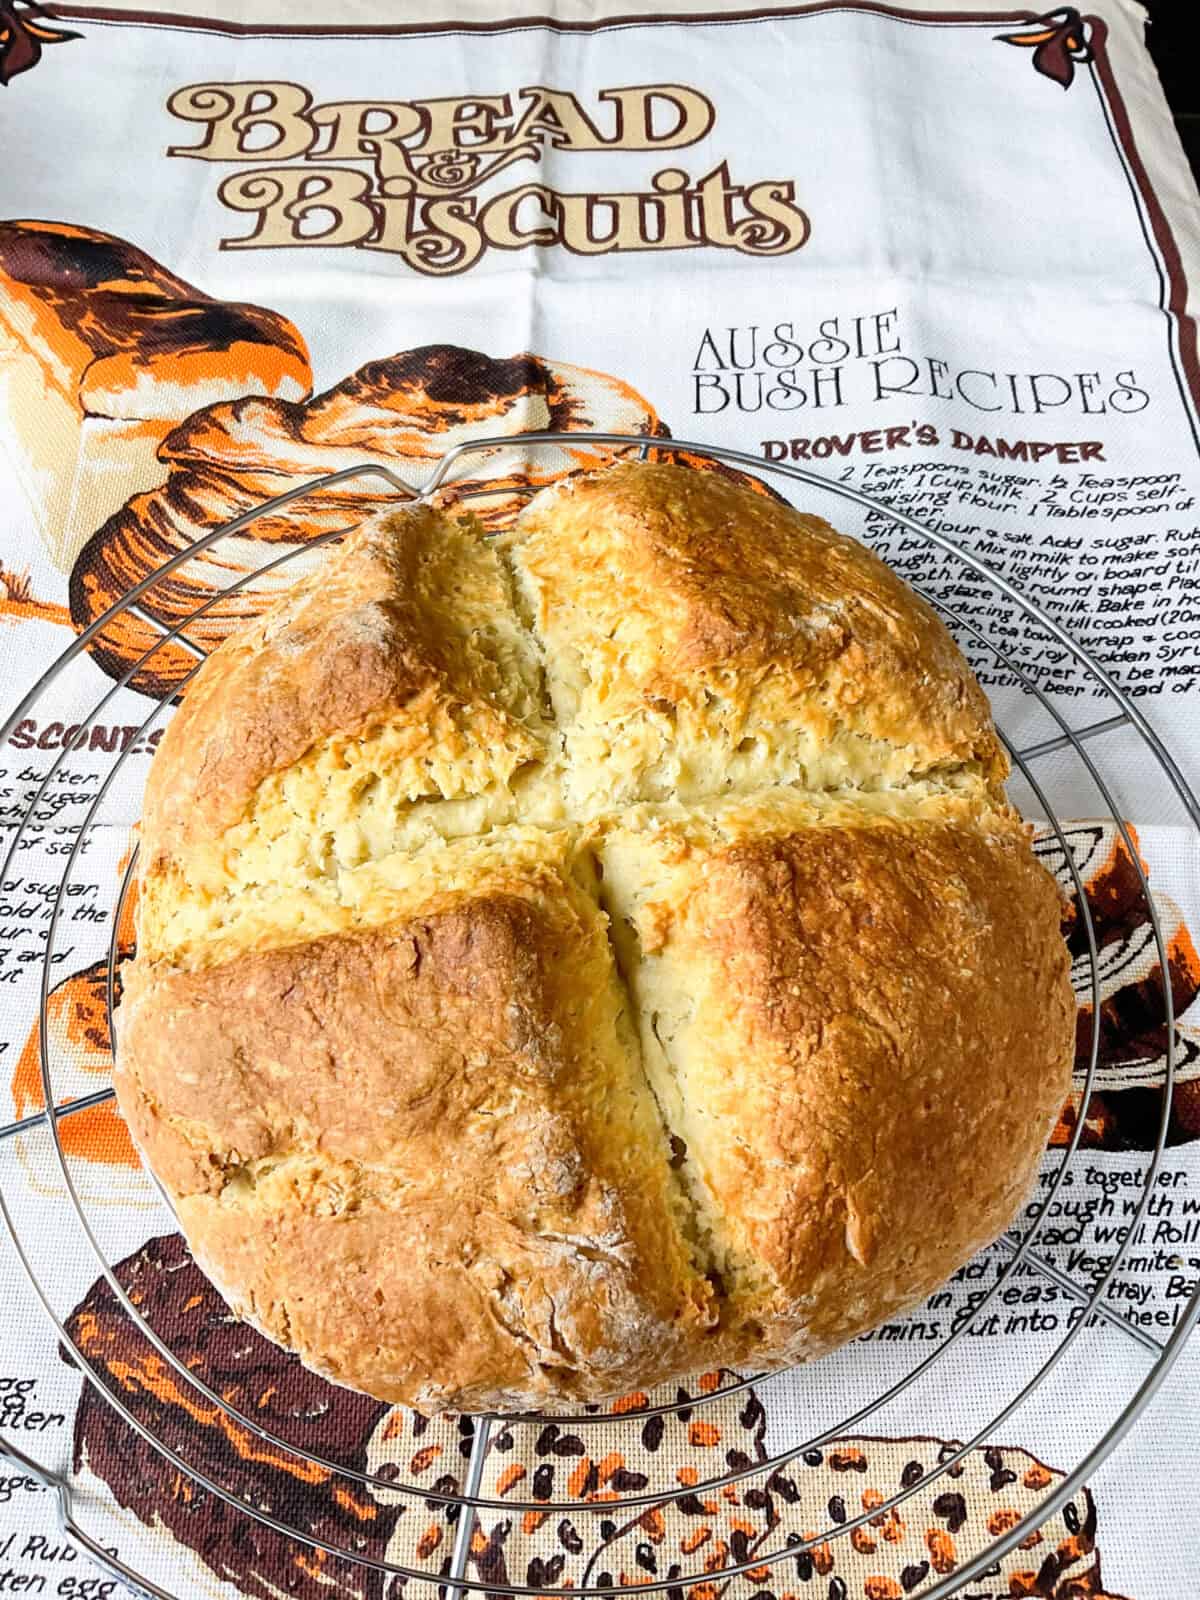
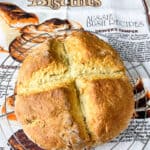
Australian Damper Bread harkens back to the days of settlers, travelers, bushmen, swagmen, drovers, and campfires, with bush ovens, Dutch ovens, and billycans filled with tea brewing beneath the stars. Despite these rustic origins, Damper Bread shares similarities with Irish soda bread and can easily be baked at home in an ordinary oven. As a no-yeast, no-rise, no-knead, no-proof bread, Damper is the ideal solution for those moments when you're caught without any bread on hand. It's also easily vegan-friendly as its a simple case of switching out the butter and milk for plant-based alternatives.
A traditional way to enjoy Damper Bread is to cut a slice or pull apart a wedge, and spread with butter and a good drizzle of golden syrup. Alternatively dunk the damper into your favourite veggie soups, stews, gravies, or sauces, as its ideal for mopping up all the veggie juices and goodness.
Jump to:
History of Australian Damper Bread
Australian Damper Bread, also known as damper, is a traditional Australian bread that is very much like the Irish Soda Bread. Damper bread originates back to the time of the early Australian settlers, particularly stockmen, drovers, swagmen, bushmen, and travellers, and was first recorded in memoirs edited by a judge in 1825.
Damper was essentially a bread made from flour and water, sometimes salt, and it was historically baked in the ashes of a campfire or covered with hot coals to bake. As it contains no yeast and does not require kneading, damper bread is a quick bread that is perfect for outdoor cooking.
Due to the few simple ingredients required to make damper, it was a staple for those who traveled long distances in the Australian outback for extended periods, such as drovers and swagmen, as they could easily carry bags of flour and mix it with water, from streams or billabongs, to make a quick bread whenever needed.

Another way that damper bread can be cooked is to wrap the dough around a stick and poke the bread into a fire until the bread is toasty and baked through. Or a smaller piece of damper dough is pushed into the end of a stick, and cooked over a fire. The cooked damper-on-a-stick is then dunked into some golden syrup, fruit jam, butter, or perhaps vege-mite, for a special bush campfire treat.
Damper is strongly associated with the iconic Australian figure, ''the swagman'' and a swagman is mentioned in the famous ballad "Waltzing Matilda." A swagman, also known simply as a "swaggie," was a travelling worker in the late 19th and early 20th centuries in Australia. These men traveled from farm to farm looking for work, carrying all their belongings in a "swag" or bedroll.
During times when work was scarce, especially during the 1890s depression, many took to the roads, traveling on foot, in search of employment. "Waltzing Matilda" was composed by the bush poet Banjo Paterson in 1895, and is often referred to as the unofficial national anthem of Australia.
The ballad tells the story of a swagman who, while camping by a billabong (a stagnant pool of water), steals a sheep and is pursued by the landowner and the law. Rather than be captured, the swagman chooses to jump into the billabong and is presumed drowned. The chorus, "Who'll come a-Waltzing Matilda with me? '' translates to Waltzing referring to walking and Matilda referring to the contents packed in the travellers swag bag.
Australian swagmen usually had the ingredients for a damper bread within their swag bag and after a long day travelling they would brew up a billycan of tea over a campfire, and under the stars, and cook damper bread in the ashes.
In modern times, the rustic damper bread is undergoing a revival of sorts as more people discover the budget-friendly, easy, quick, and tasty qualities of damper. Damper has long been a firm family favourite in many Australian households but it is well on its way to become a global sensation, as more people discover the homely recipes from the past that can enrich their present lives.
Also, damper bread recipes have developed over the centuries, from the first simple humble recipes of flour and water, with the additions of ingredients such as- butter, milk, buttermilk, sugar, beer, chocolate, dried fruits, nuts, seeds, cheese, fine chopped onions, bacon, olives, sundried tomatoes, vegemite, chilli's, spinach, fresh or dried herbs, and spices, and much more!
Australian damper bread is the perfect emergency budget-friendly bread for those occasions when the pantry is bare and tummies are hungry! Enjoy a slice or wedge simply spread with butter or margarine, with golden syrup, fruit jam, onion or tomato chutney, slices of vegan cheese, a scoop of canned baked beans or spaghetti hoops, or dunked into soups or stews.
How to prepare
Preparing Australian damper bread is very easy as its just a case of mixing up the ingredients, forming into a dough ball, and baking. No special techniques or equipment required as everything is done quickly by hand and the only tools that are needed is a knife and mixing bowl, along with a baking tray for the bread.
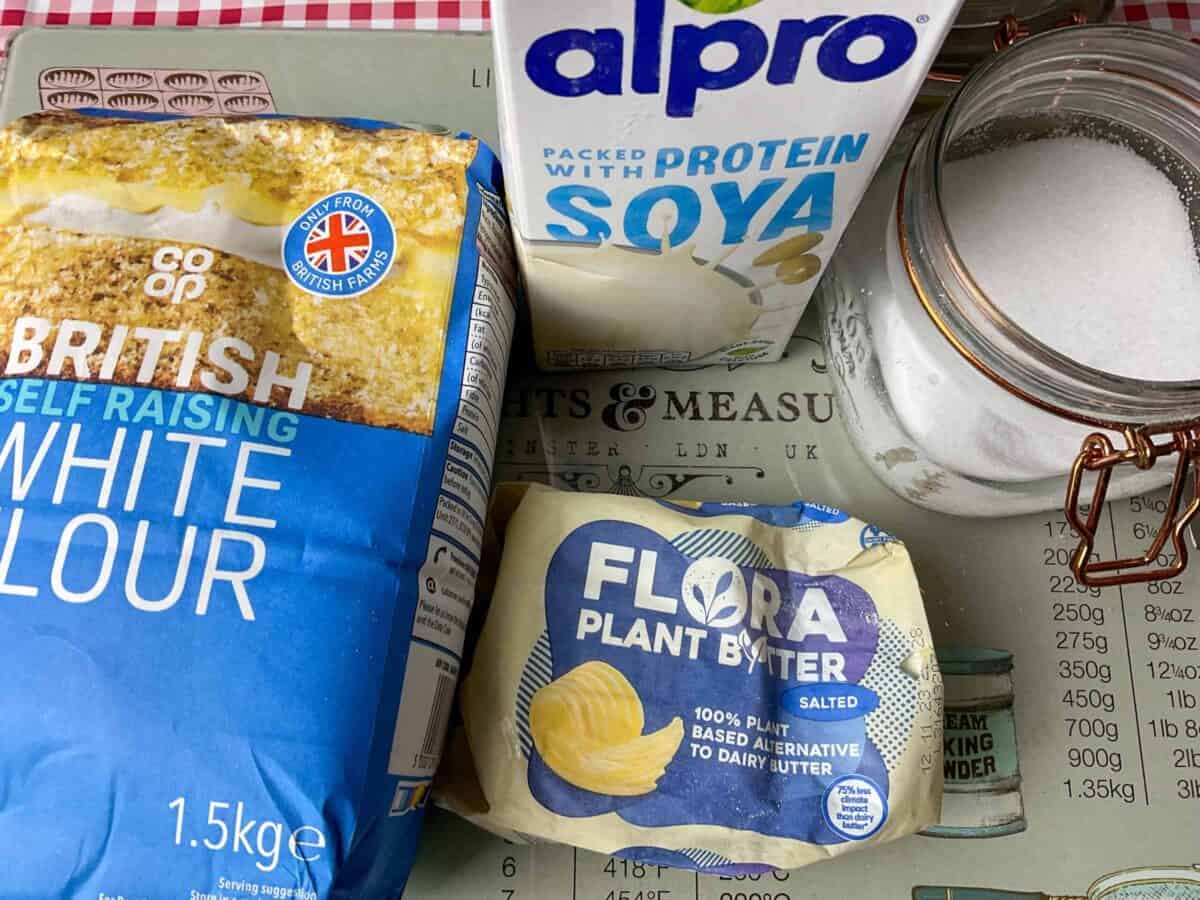
1. Gather all your ingredients - you only need 4 - self-raising flour, butter, milk, and salt. And some water. [If you would rather use plain flour or all-purpose flour check out the recipe FAQ section below]

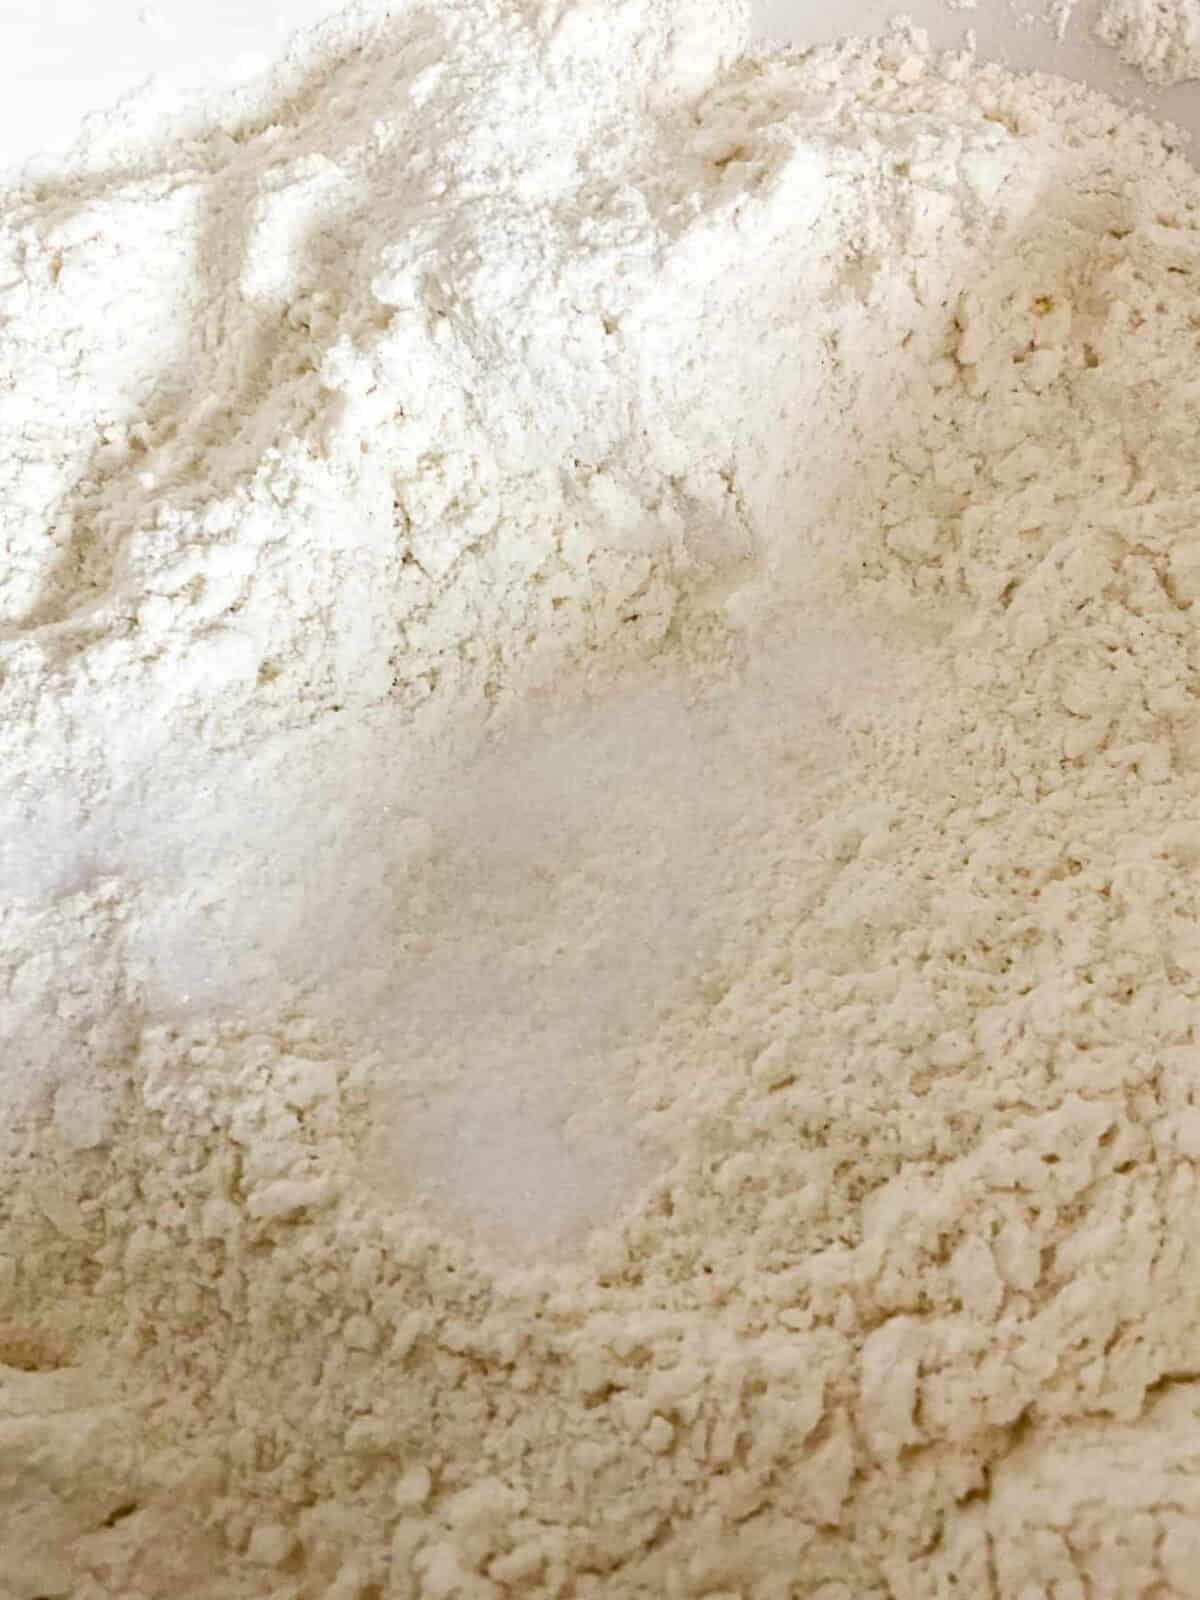
2. Add the flour to a mixing bowl along with the butter or margarine.
3. Using your finger tips rub the butter into the flour until its all mixed through.
4. Stir through the salt.
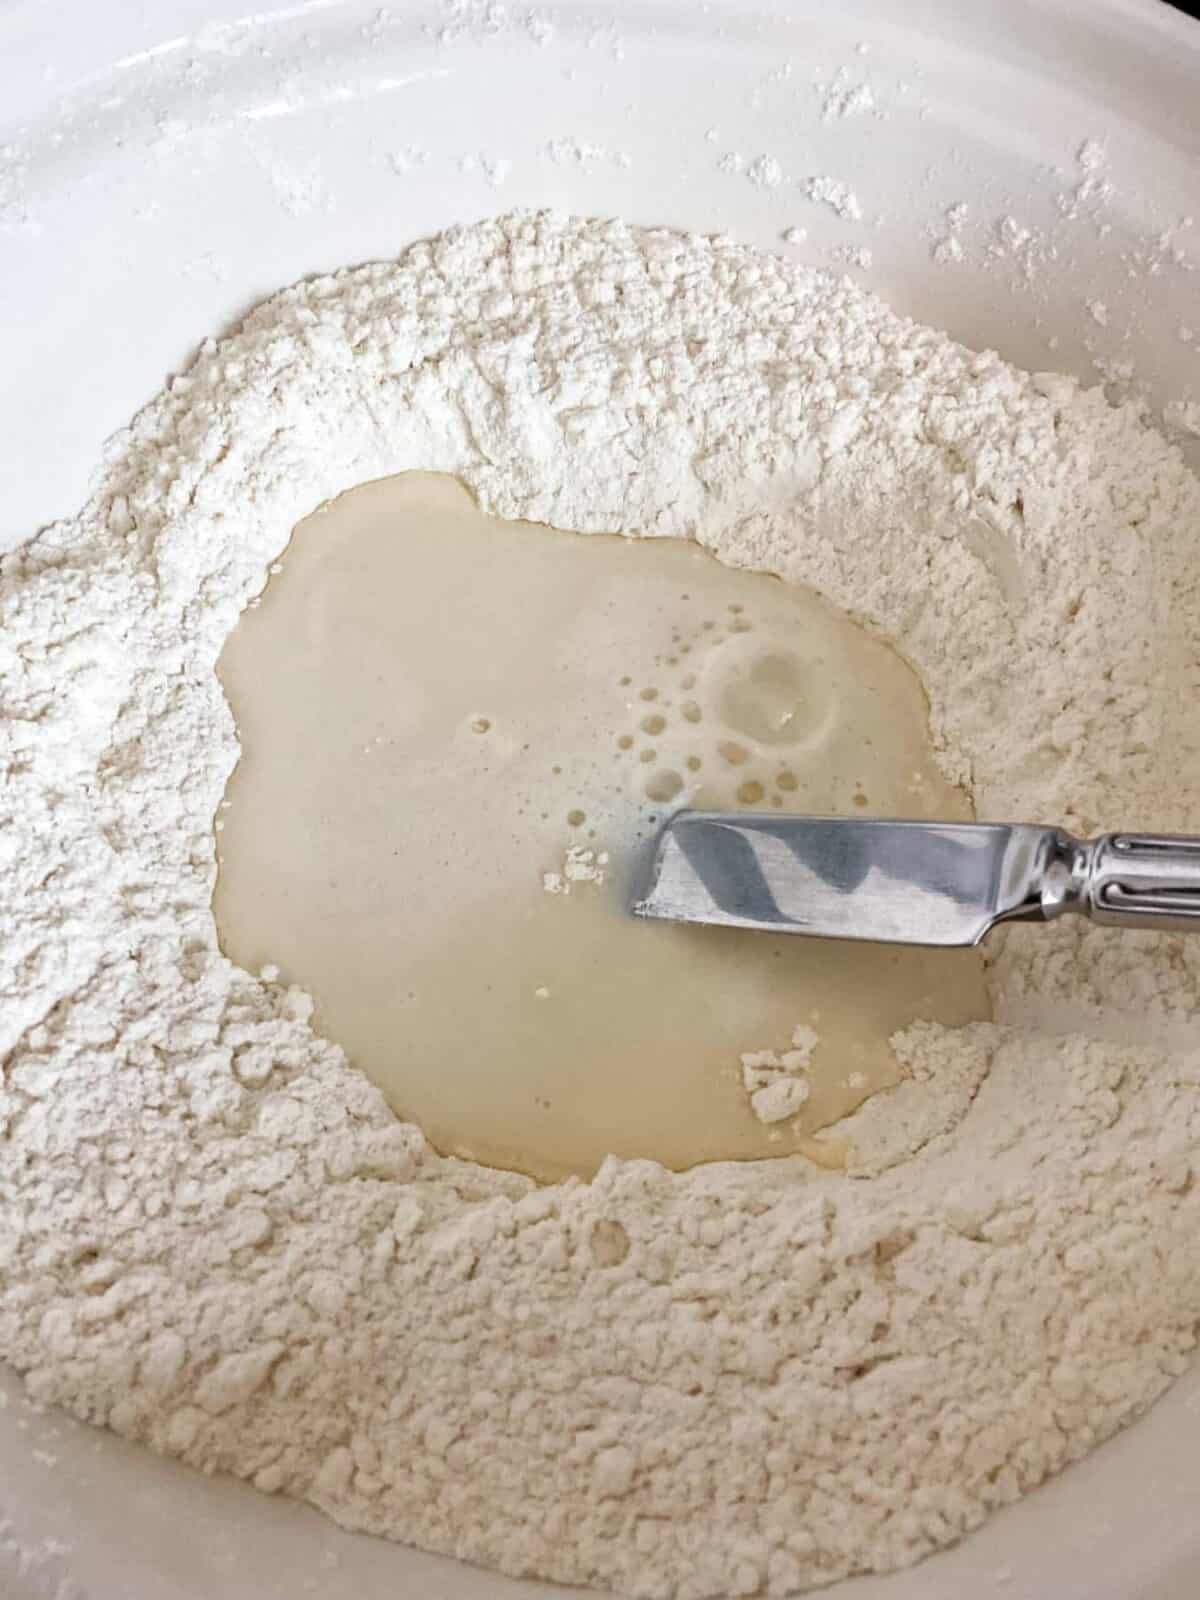
5. Push the flour mixture to the sides of the bowl and pour in the milk and water.
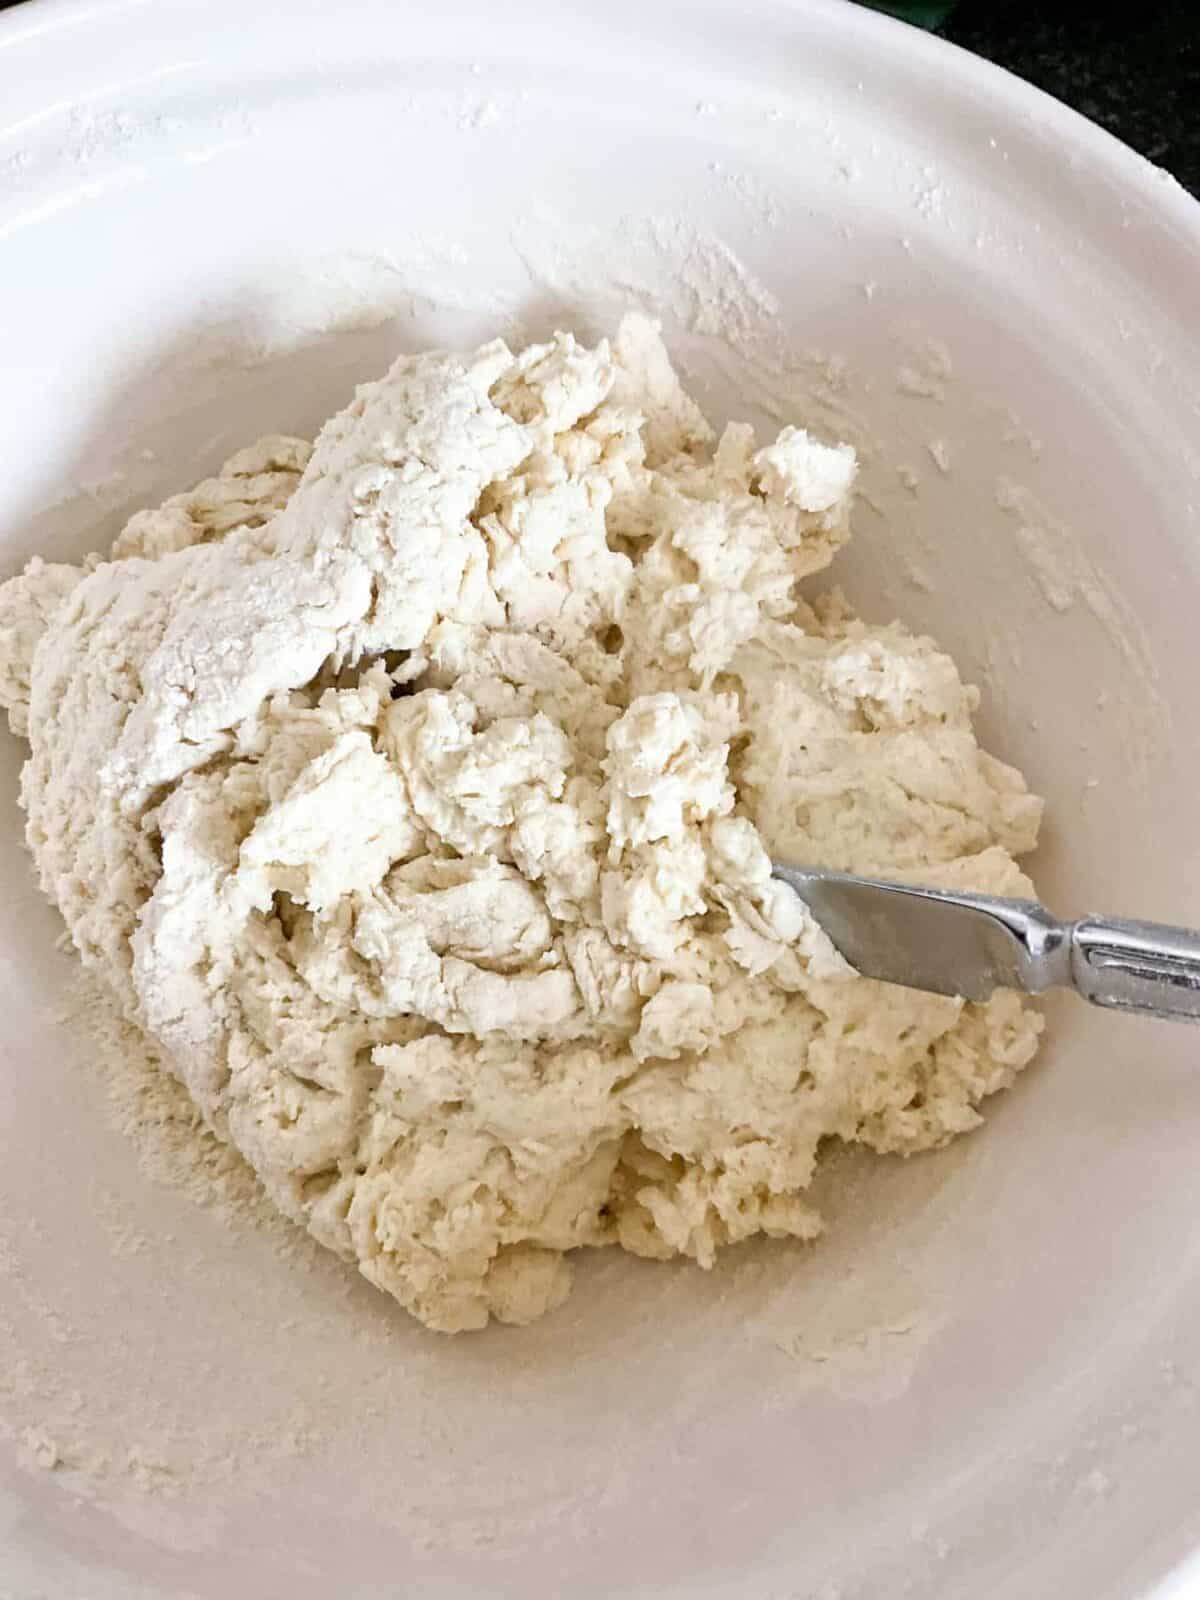
6. Using a cutlery knife stir the liquids through the mixture until it all clumps together.

7. Using floured hands bring the dough into a ball shape.
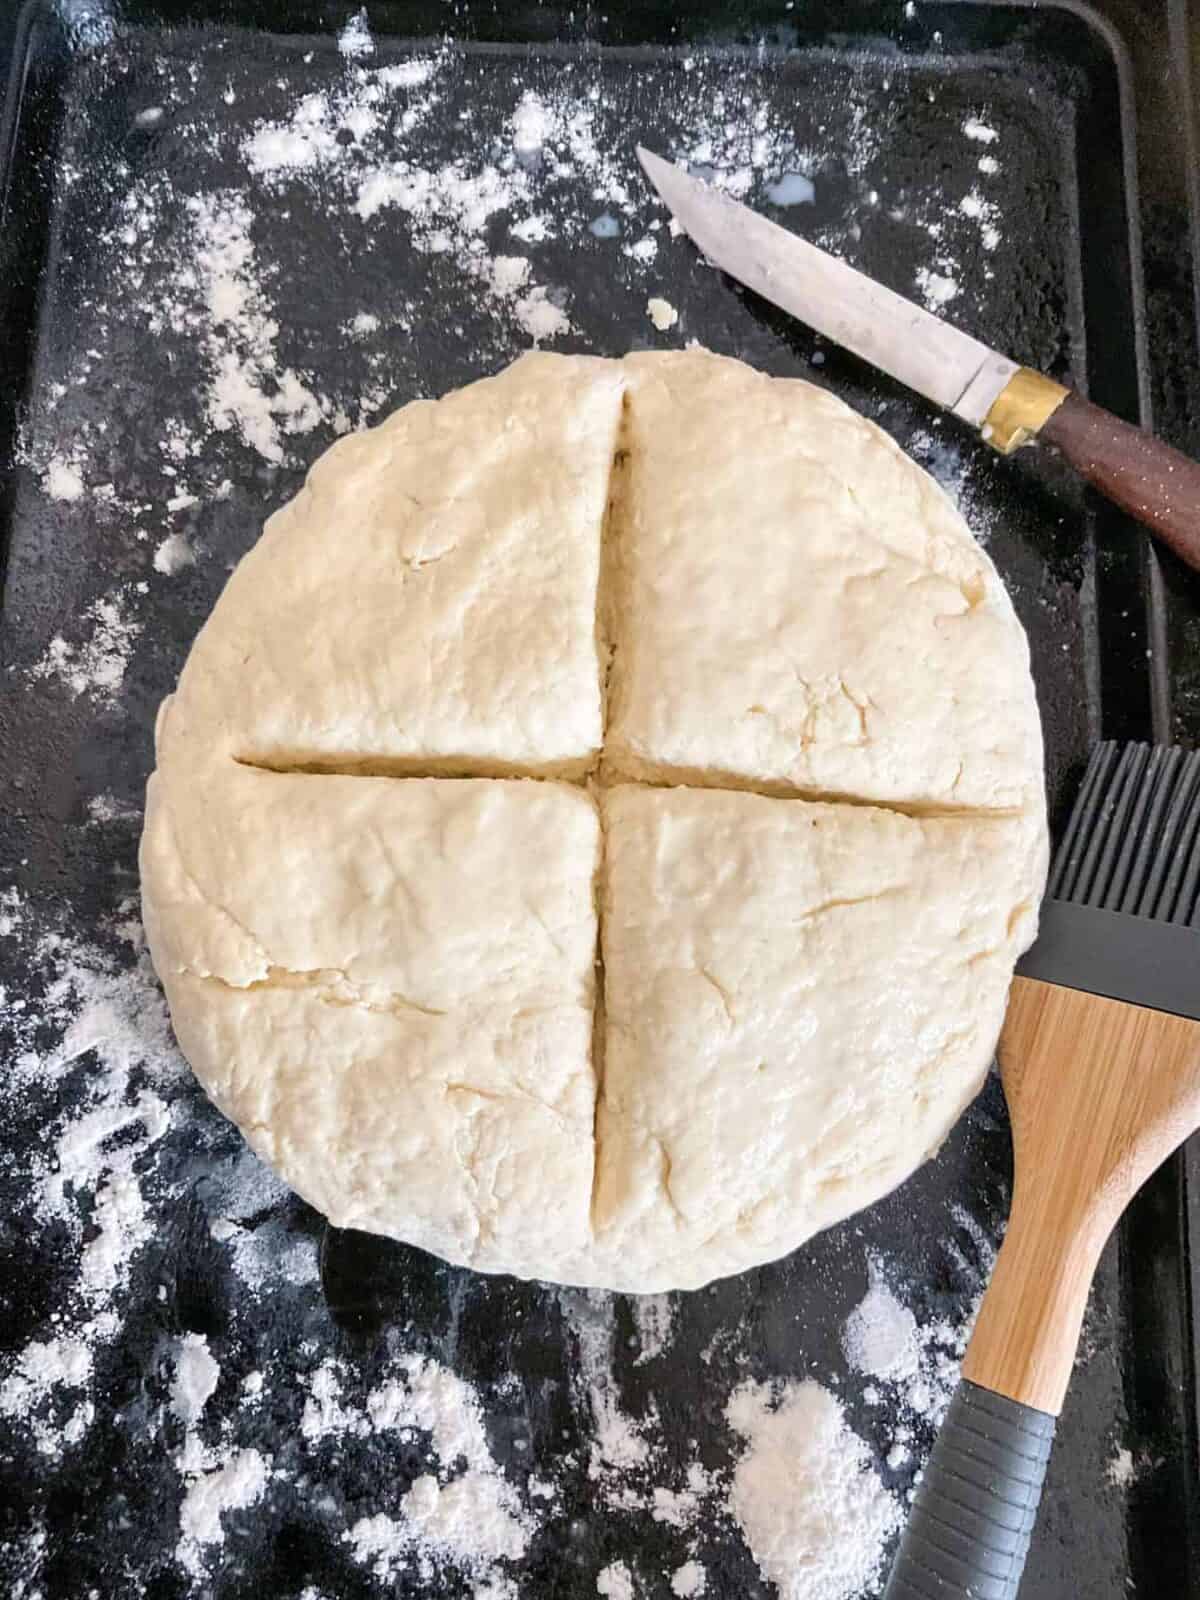
8. Place onto a greased and floured baking tray and pat down to a circle roughly 16-17cm diameter and 3 cm high.
9. Score a deep cross through the dough and brush the surface with milk.
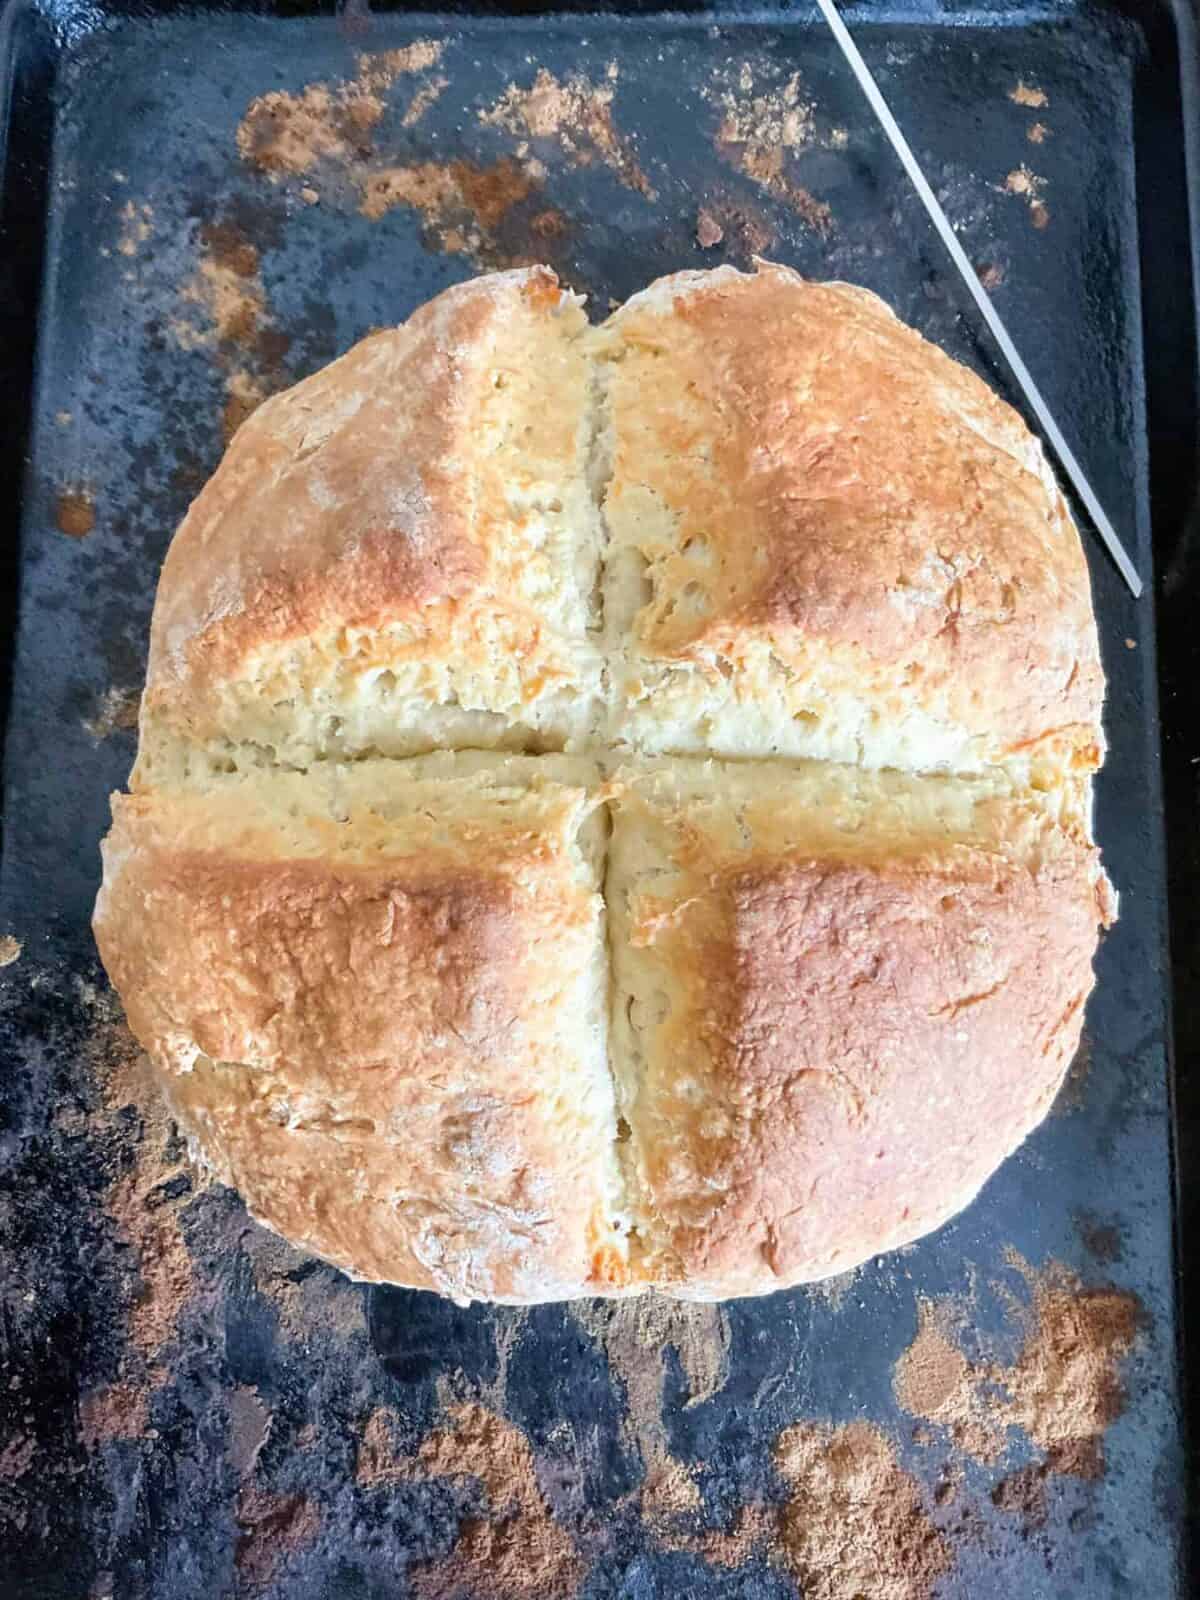
10. Bake for 30-40 minutes until risen, golden brown, the bread sounds hollow when tapped, and a skewer popped into the middle comes out clean.
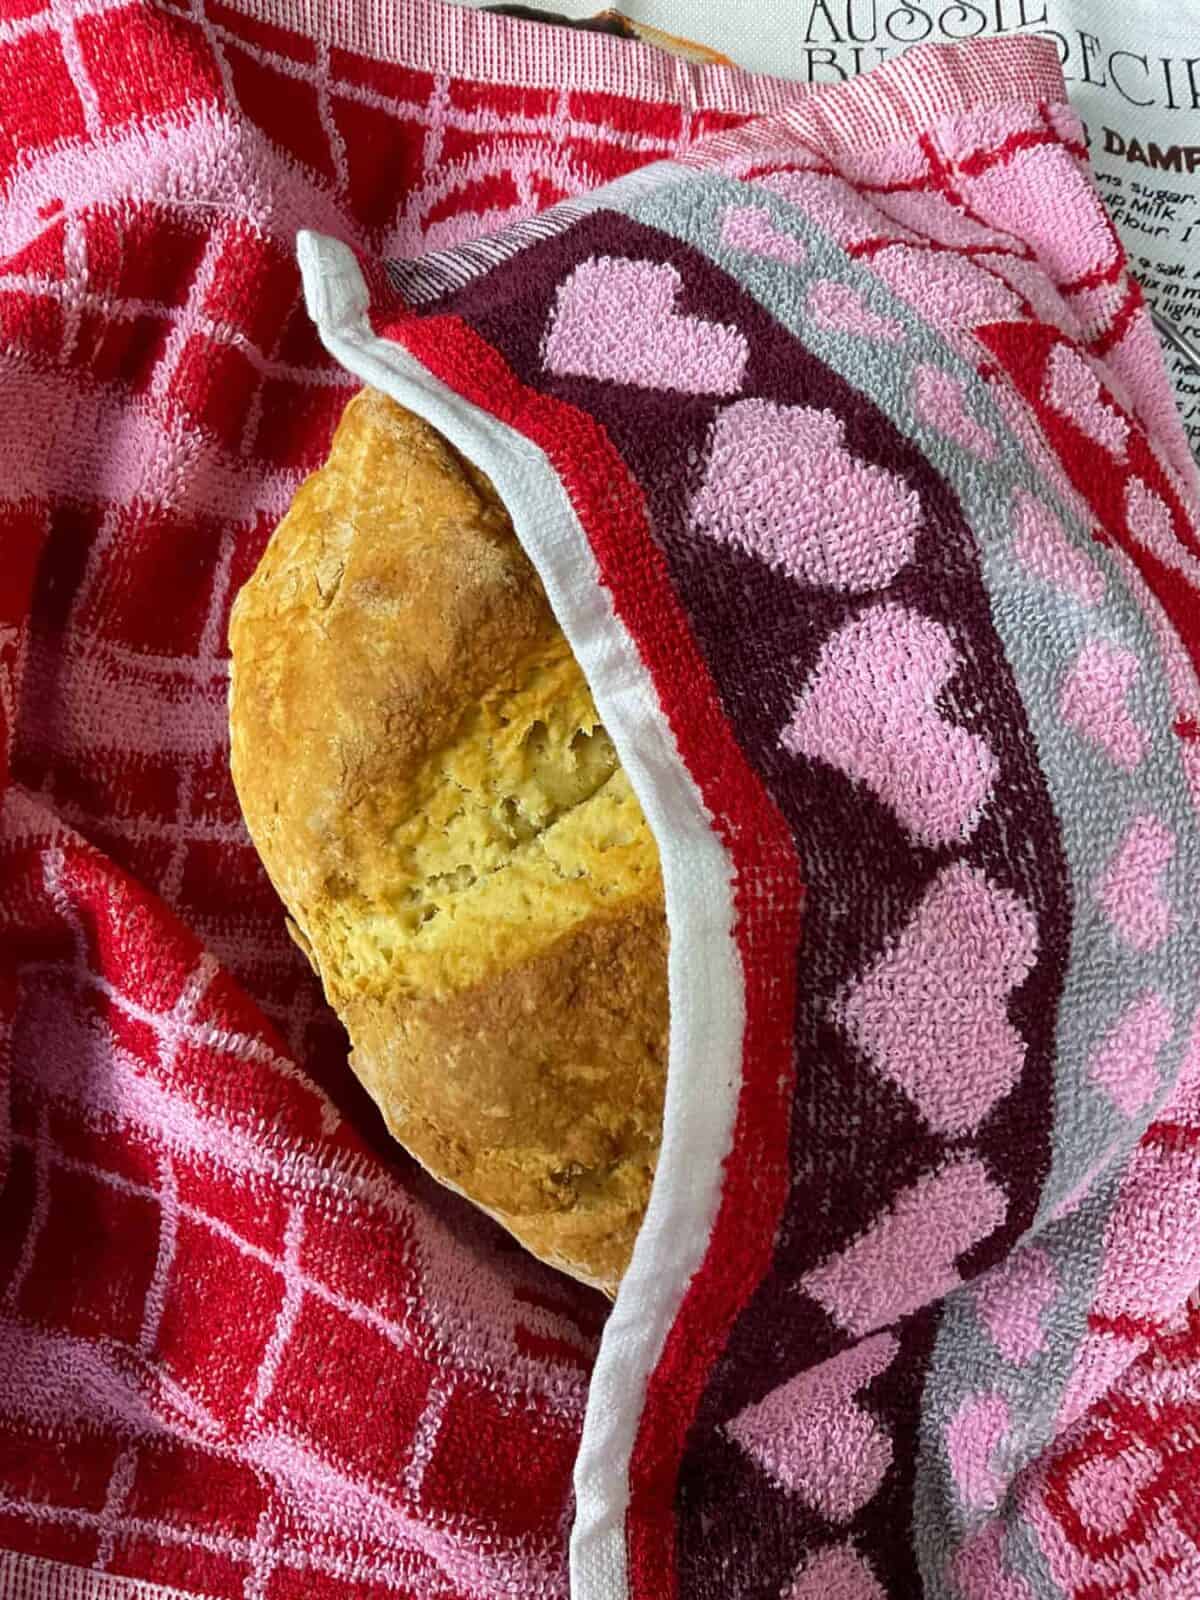
11. For a softer crust the hot bread can be wrapped in a tea towel and left to cool.
12. Or set the bread onto a wire rack to cool.
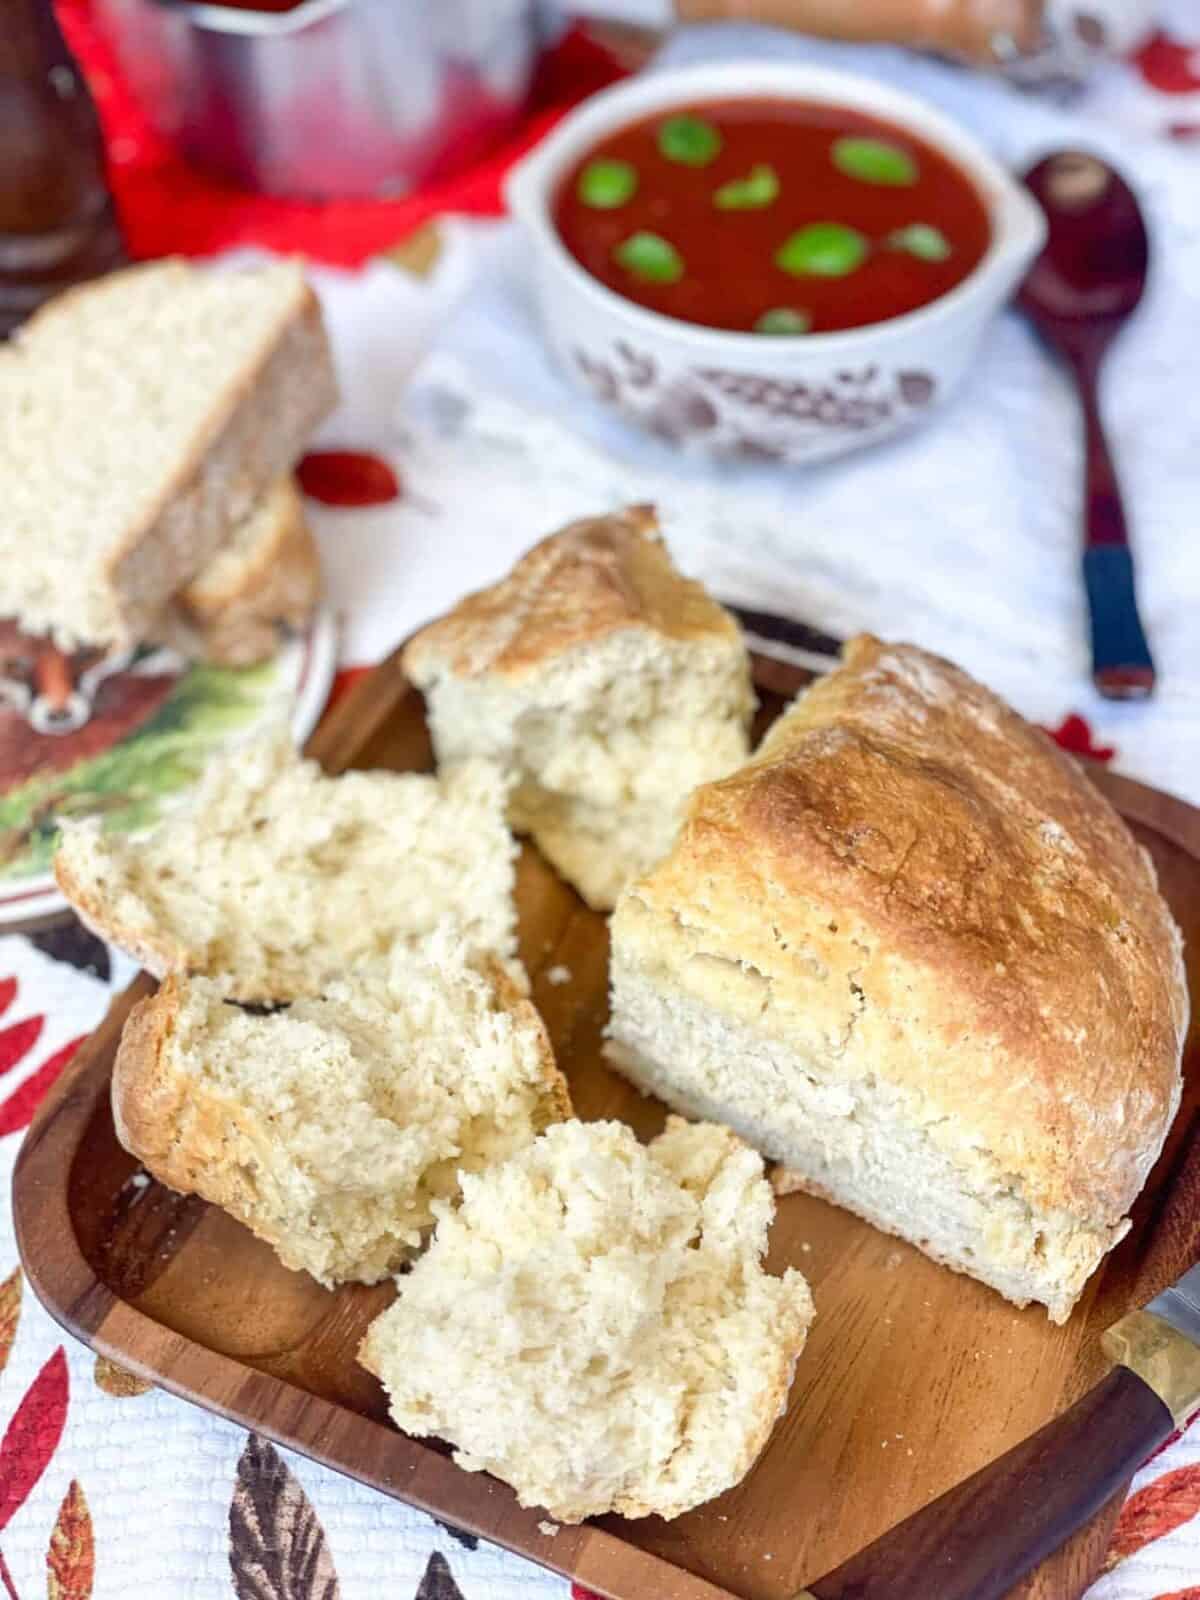
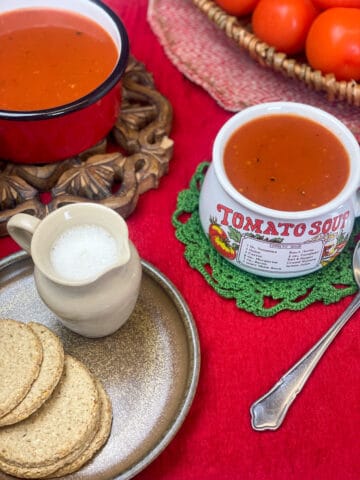
Home-made Damper Bread is delicious enjoyed warm from the oven, pulled apart into chunky wedges, and dunked into tasty home-made soup or stew, such as our easy Budget-Friendly Tomato Soup.
Or go with an Australian traditional sweet topping of a drizzle of golden syrup.
However, the idea of drizzling golden syrup over freshly baked bread also dates back to the late 1800s and early 1900s Britain when after a cricket match English schoolboys enjoyed a traditional Cricket Tea which included - ''Blundell's boys piled thick cream on to thick slices of plum cake, or trickled golden syrup over substantial slices of bread and cream which they called 'thunder and lightening''' and this was regarded as 'school tuck'. [pg 280, Good Things in England, Florence White, 1932].
Recipe notes
Storage
Damper bread is at its best on the first day of baking but will be fine the next day if stored within a bread or food bag, or wrapped up within a clean tea towel. Damper will still be good for eating on the 3rd and 4th day but as the bread tends to become drier as the days go on, it will be much more tasty if older slices are toasted.
Freezing
Cooled damper bread can be easily frozen, and if you know you won't eat some of the bread once its baked then it is best frozen on the same day. Simply wrap the bread securely in food-safe wrap, and then place it into a food bag or airtight container. You can choose to freeze the entire loaf or, for more convenience, freeze the individual triangles. Alternatively, use a bread knife to slice the bread into slices or smaller triangles and freeze those. Properly stored, the damper bread will keep well in the freezer for 2-3 months.
FAQ'S
There are many reasons for scoring damper bread. Scoring a cross onto the damper bread helps to ensure that the middle of the bread, which bakes the slowest, is properly baked through.
Also, as damper bread is a quick bread, it means that it expands quickly in the oven as soon as the baking powder, contained within the self-raising flour, gets to work and creates gas bubbles, so having a score helps to prevent the bread from creating its own random cracks. Having a score also helps the steam escape through the cracks which helps contribute to a softer crumb that is not excessively moist or dense.
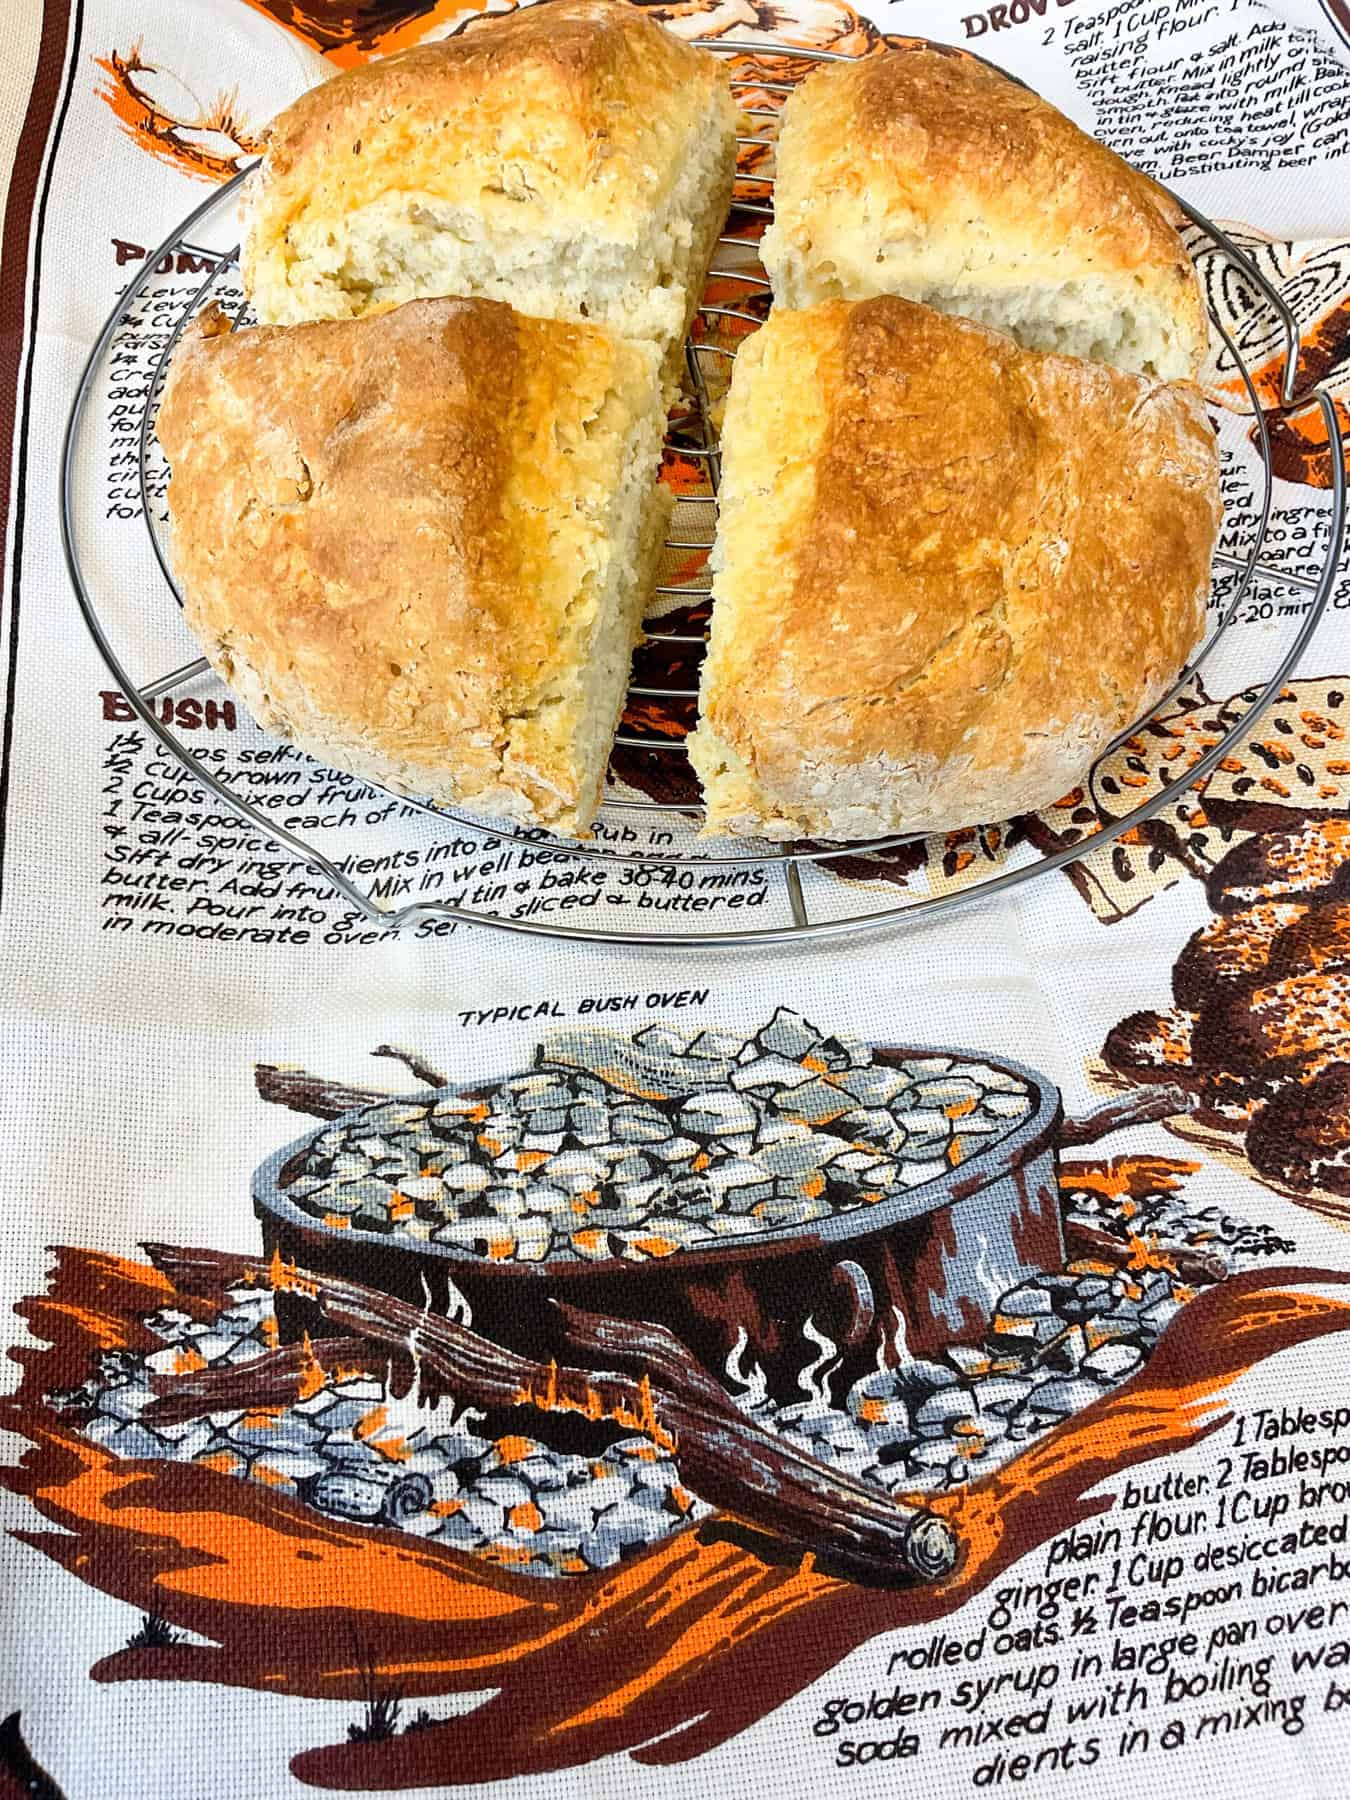
Another good reason to score damper bread is that it helps with pulling it apart once baked as the bread is traditionally a camp-fire bread, so having a convenient easy way to divide up the bread is a great idea especially if no bread knife is available.
We like to score one cross across the unbaked damper but if liked better, you can score an extra cross so that the bread is divided into 8 smaller triangles rather than 4.
Many believe that the term "damper" is derived from the practice of "damping down" or reducing the heat of a fire by covering it with ashes. Historically, damper was baked directly in the ashes of a campfire. As the bread was often cooked by "damping" the fire and placing the dough among the ashes, it earned the name "damper."
Australian aborigines have a traditional bread called a seedcake or bush bread that is also referred to as a damper bread. However, Australian damper uses different ingredients and is associated with European settlers in Australia, particularly with stockmen, drovers, and swagmen, who traveled long distances and needed a simple and filling bread they could make on the go. Its popularity grew as a campfire staple because of its straightforward ingredients and the ease with which it could be cooked over an open fire.
Although, the practice of baking a form of bread using native grains and seeds predates European settlement in Australia, as Australian Aboriginal people had been grinding seeds into flour and baking it on ashes for tens of thousands of years. The bread they made might be considered a precursor or an early form of damper.
The modern damper bread, made primarily with wheat flour (which is not native to Australia) and often using baking soda or self-raising flour for leavening, is more closely tied to European traditions and ingredients introduced by the settlers.
So, while damper as it's commonly known today is not an "Aboriginal bread" per se, the concept and method of baking bread from ground seeds on ashes is an ancient practice rooted in Aboriginal culture. The modern damper, however, is a product of the blend of this ancient practice and European ingredients and techniques.
Yes, baking damper in a Dutch oven is a great idea and will bake a beautifully rustic loaf. To prevent the bread from sticking, line the bottom and sides of the Dutch oven with parchment paper. This will also make it easier to remove the bread from the hot pot once it's baked. If you prefer a crustier top, you can remove the lid of the Dutch oven for the final 10-15 minutes of baking.
Yes, of course. We use 2 tablespoons of vegan butter but you can add 1 or 2 extra tablespoons of whatever butter you prefer to your damper for an extra softer crumb.
Of course, even though self-raising is usually the flour of choice for damper it can be switched out for all-purpose or plain flour. Although, for our damper bread recipe, if using plain flour, also include 1 tablespoon of baking powder and a ½ [half] teaspoon of bicarbonate of soda [baking soda].
Yes, you can adjust the salt in the recipe to your liking, although the flavour may be slightly different. Some people are more sensitive to saltiness, and the salt content in flour blends can vary, especially across different countries.
For instance, in the UK, self-raising flour typically does not have added salt, which is why some UK recipes might call for more salt. In contrast, in the US and Australia, self-raising flour is known as self-rising flour and usually contains added salt.
Additionally, the saltiness of margarines or butters can vary widely. So, when making your damper bread, consider your own taste preferences and the salt content of the ingredients you're using.
If you would like to slice cleaner slices or wedges of damper bread it is important to cool the bread before attempting to slice. As if you attempt to slice a hot damper bread it will release steam and could cause the bread to become too gummy or moist.
Allowing the bread to cool until its at least warm and not piping hot, ensures that the crumb sets soft and perfectly moist, making it easier to slice into cleaner pieces.
Your choice of knife is important as its best to use a serrated bread knife as this type of knife grips onto the bread as its sliced and avoids squashing the bread too much. Use a sawing motion as you slice and don't press down too hard to avoid flattening the bread as you slice or crumbling it too much.
Slice the damper bread through the cross and then each triangle can be sliced into horizontal pieces but you will likely have to slice a few small wedges as well. Alternatively, slice each triangle into 3-4 smaller triangle wedges.
If clean slices are not preferred then simply use your hands to pull apart the scored bread into 4 triangles and then pull apart each triangle into chunky wedges. Damper bread is a rustic bread so this method is very authentic!
To refresh larger wedges of damper bread, or perhaps half a damper bread, or a whole damper, sprinkle a few drops of water over the top of the bread and warm the bread through in a warm oven for a few minutes.
If you would prefer a softer crust then as soon as the bread comes out of the oven wrap it up with a clean tea towel or thick cloth and leave the bread to cool within its wrappings. Doing so will soften the crust as it cools but of course it won't be as soft as other types of bread as damper is a rustic quick bread.
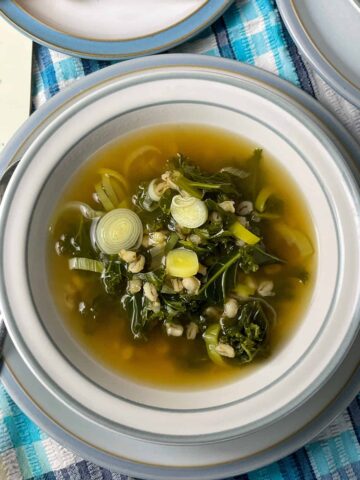
Any soup or stew is delicious served with a wedge of damper bread, and we love our Vegan Chuckwagon Stew, Budget-Friendly Quick Tomato Soup, or our Scottish Barley Kale Broth with a side of damper for dunking and mopping up the delicious veggie juices. Dipping the crisp chewy rustic damper crust into savoury veggie goodness is the perfect way to soften it up!
Additionally, slices of damper bread can be toasted and served with a scoop of Homemade Baked Beans in a Tomato Sauce, or Boston Baked Beans, or Traditional British Mushy Peas, or these tasty Old-Fashioned Creamed Mushrooms, Creamed Chickpeas or Creamed Spinach.
Damper bread also makes a tasty bread to enjoy with a vegan take on a traditional British Ploughman's lunch which is perfect for pack-ups, pack-lunches, picnics, hikes, bush-walks, and food-on-the-go.
For a simple Ploughman's lunch have a few slices of a wedge of damper along with a chunk of vegan cheese, and a few pickled onions. Have a look at our Vegan Ploughman's Lunch Platter or Sandwich recipe post for more ideas.
Another idea is to prepare delicious vegan cheese damper toasties by spreading slices of damper with tomato sauce or ketchup, sprinkle some grated vegan cheese over, along with a few slices of fresh tomato and grill or broil until the cheese is melted.
Toasting slices or wedges of damper bread and spreading vegan butter or margarine over the hot damper is a tasty treat.
Here are some of the best methods you can use to toast damper bread:
1. Toaster (best for slices)
* Slice your damper bread, thicker slices are best for toast but of course the slices have to fit your toaster machine so do slice to fit your toaster.
* Place the slices into a toaster and toast until golden brown. The settings will depend on your toaster and how crisp you want the bread.
2. Oven or Toaster Oven
* Preheat your oven or toaster oven to 170 Fan, 190°C, (375°F), Gas 5.
* Slice the damper bread into slices or wedges and place them on a baking sheet.
* Toast in the oven for about 5-10 minutes, flipping once during the process to ensure even toasting. Keep an eye on them, as oven temperatures can vary and you don't want to burn them.
3. Grill (Barbecue or broiler)
* Preheat your grill to a medium heat.
* Slice the damper bread into wedges or thicker slices.
* Place them directly on the grill grates.
* Grill for 2-3 minutes on each side, or until the bread is toasted to your liking.
4. Stovetop (Skillet or Pan)
* Over a medium heat, warm up a skillet or frying pan. You can lightly brush it with some vegan butter or oil if desired, but it's not necessary.
* Place your slices or wedges of damper bread in the pan.
* Toast for 2-4 minutes on each side, or until they're golden brown and crispy.
* Alternatively, toast damper bread on the hotplate of a panini press or grill machine.
5. Open Flame (Campfire or Gas Stove)
* If you're going for a more rustic approach, you can toast damper bread over an open flame.
* Place slices or wedges on a skewer or long fork.
* Hold them over the open flame, keeping them in constant motion to avoid burning.
* Toast for a minute or two until crispy and slightly charred.
Tips:
* For added flavour, you can brush the damper bread with vegan butter or olive oil before or after toasting.
* Always keep an eye on your bread while toasting to avoid over-toasting or burning.
* Enjoy toasted damper bread with your favorite spreads, jams, syrups, or toppings.
Yes, here is a few tips for baking the best damper bread:
1.Choice of Flour: Self-raising, or self-rising flour, is the best flour for damper as it ensures consistent results.
2. Butter Temperature: Ensure the vegan butter is cold as this will help create a crumbly and soft inner texture which is ideal for damper.
3. Gentle Mixing: Avoid overworking the dough as this will activate too much gluten, the damper dough should be mixed until just combined as this will ensure a soft and tender crumb.
4. Consistency Check: Your dough might be slightly sticky but it should be easy to handle so if its too wet to shape, dust your hands with flour and sprinkle extra flour around the bread as its shaped. If it's too dry, it can become too crumbly once baked.
5. Traditional Techniques: Historically, damper was cooked over campfire ashes. If you're up for an adventure, try baking it on an outside grill or campfire for that authentic smoky flavour.
6. Scoring: Always score the top of your damper as this not only gives it a traditional appearance but also helps in even baking and easy separation of the bread.
7. Baking Sheet Prep: Properly greasing and flouring your baking sheet ensures the bread doesn't stick and gives the bottom a nice crust.
8. Brushing the Top: For a golden-brown crust, always brush the top of your damper with a little milk before baking.
9. Test for Doneness: Tapping the bottom for a hollow sound is a traditional way to check, but for more certainty, use a skewer or toothpick. A good indicator that damper is baked is that its a lovely golden brown colour and has puffed up in the oven beautifully.
10. Serve Warm: Damper is at its best cooled a little and then enjoyed warm soon after baking. Serve with vegan butter, jam, vegan cheese, or with a hearty stew or soup.
11, Toasting: Older slices of damper are very tasty toasted or warmed through in an oven so no need to waste older slices.
12. Storing: If you have leftovers, wrap them in a clean tea cloth or aluminium foil to maintain freshness and store in a bread bin or airtight container.
13. Freezing: Freeze any cooled damper that you know you won't eat within a few days so that you can have fresh damper whenever you like.
14. Adjust Oven Position: Place your baking tray or sheet on the middle oven rack to promote even browning and cooking.
15. Monitor Oven Temperature: Oven temperatures can vary so if possible, use an oven thermometer to ensure the temperature is accurate, and if you have any hot spots perhaps turn the baking tray around half way through baking to ensure even browning.
16. Quick Serve Tip: For a delicious treat, enjoy a warm just-out-of-the-oven wedge of damper slathered with vegan butter and a sprinkle of nutritional yeast, or a drizzle of golden syrup, or your preferred syrup.
Damper bread dries out more quickly than some other breads due to several factors:
1. Ingredients: Damper is made with simple ingredients like flour, salt, water, and sometimes butter or milk and it does not contain preservatives or fats that can help retain moisture.
2. No Yeast: Damper is a quick bread that does not use yeast. Yeast can create a more developed gluten structure in bread, which helps to trap moisture and keep bread softer for longer.
3. Baking Method: Damper is often baked in the open air, on campfires, or in Dutch ovens without the humidity control of modern ovens and this can lead to more moisture loss during baking.
4. Crust: Damper tends to have a harder and thicker crust compared to some other breads and while the crust can protect the interior to some extent, once it's cut, the bread inside can dry out quickly.
5. Density: Damper is a denser bread, and as dense breads tend to dry out faster once they're cut so will home-baked damper.
The solution is to enjoy your damper bread soon after baking, or to help keep it fresher for longer wrap it in a clean cloth while it's still warm or store it in an airtight container once it has cooled. Also, only slice pieces of the damper as you want them as then the inside will stay moister for longer.
Leftover damper bread can be repurposed in many ways such as breadcrumbs, croutons, bread soup, bread salad, vegan French toast or cinnamon toast.
1. To make toasted breadcrumbs:
* Preheat your oven to 150°C (300°F).
* Slice the damper bread and then cut or tear it into smaller chunks.
* Spread the chunks evenly on a baking sheet.
* Bake in the oven for 10-15 minutes or until they are completely dry but not browned.
* Once cooled, place the dried bread pieces in a food processor or blender. Pulse until the bread is reduced to the desired crumb size.
* Store the breadcrumbs in an airtight container.
* Alternatively, miss out the toasting and add chunks of damper to a food processor and pulse until crumbed. Or use a cheese grater and shred up the bread into crumbs.
Use the breadcrumbs for coating home-made vegan patties or burgers, for savoury recipes such as vegetable gratin [this recipe uses crushed cornflakes but those can be subbed for breadcrumbs], or for sprinkling over soups or stews, or for vegan dressing or stuffing recipes.
2. To make croutons:
* Cut the bread into cubes, drizzle with olive oil or toss in some vinegar such as red wine vinegar or balsamic, and season with herbs, salt, pepper and perhaps some nutritional yeast flakes.
*Bake in the oven at 160 Fan, 180°C, 350°F, or Gas 4, until they're crispy. Keep your eye on them and turn them over half way through toasting.
* These are perfect for salads or soups.
3. To make bread soup:
* The simplest way to prepare a bread soup is to stir through small chunks of bread to a home-made soup and let the chunks sit and soak up the tasty soup flavours, before enjoying.
* For centuries, bread has been incorporated into soups and stews as a thickening agent, particularly in countries like Italy and Greece, to create heartier meals. Similarly, in traditional British cuisine, breadcrumbs have long been used to thicken soups, stews, and sauces.
* Soften leftover small chunks of damper by mixing it through our Minestrone Soup or our Italian Cabbage and Bean Soup.

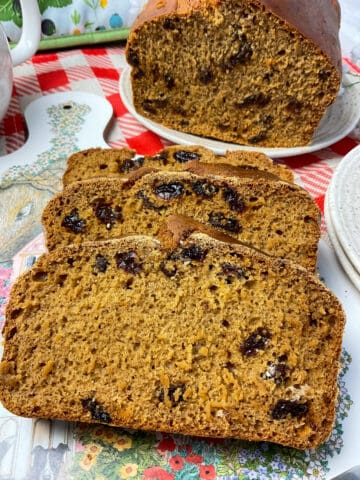
This Australian Damper Bread recipe has a delicious crisp and chewy crust with a soft crumb, it also provides a wonderful fresh bread aroma as it bakes, and is delicious spread with a little vegan butter and enjoyed for a quick snack. For a softer crust, wrap the just-baked damper in a clean tea towel and allow to cool within the cloth. Damper bread is perfect for those who are allergic to yeast, as well as those looking for a tasty budget-friendly bread recipe that can be prepared easily and quickly.
Accompaniments: vegan soup & stew recipes
These are a few of our favourite vegan soup and stew recipes that are particularly delicious with a slice or wedge of Australian Damper Bread that is used for dunking and soaking up the tasty veggie juices. Check out our Vegan Soup Recipes and Vegan Stew Recipes for more family favourite Vegan Dinner Ideas and Vegan Lunch Recipes.


For another traditional Australian favourite check out this ridiculously easy classic Australian Fairy Bread recipe, which is perfect for budget-friendly children's birthday party or special treats.
***please note: for US measurements click the 'US customary button' within the recipe and the measurements will switch to tablespoons, cups, and ounces.***
📖 Recipe
Australian Damper Bread
Equipment
- Baking sheet or tray
- Mixing bowl
- metal cutlery knife or similar
- Pastry brush
Ingredients
- 580 grams self-raising flour [plus extra for dusting hands, work surface, and baking sheet] see the notes below for using plain or all-purpose flour
- 2 tablespoons vegan butter [or your usual butter, baking block, or margarine that's suitable for baking] plus a little extra for greasing the baking sheet
- 1½ teaspoons salt [use ½ teaspoon salt if using self-raising or self-rising flour that originates outwith the UK, as salt will likely already be added to your flour]
- 250 millilitres plant-based milk [we used soya milk, but you can use your usual milk] plus a little extra milk for brushing over the bread dough
- 120 millilitres water
Instructions
- Preheat the oven to 180 Fan, 200C, 392 Fahrenheit, Gas 6.
- Add the flour to a mixing bowl and rub the butter into the flour using your fingertips, until the butter is crumbled finely into the flour.580 grams self-raising flour, 2 tablespoons vegan butter
- Stir through the salt.1½ teaspoons salt
- Make a small gap or well in the bottom of the bowl by pushing the flour to the side exposing the bottom of the bowl.
- Pour in the milk and water and use a metal cutlery knife to stir the liquids into the flour until it starts to clump together and leave the sides of the bowl.[If your using a 240ml or a US cup measurement, then add an extra 2 teaspoons of milk to your cup measurement, so that it will equal the 250mls required]250 millilitres plant-based milk, 120 millilitres water
- Using floured hands pat the dough together to form a ball of dough, knead gently for a few seconds just until it is firmly together.
- If the dough is too wet to handle easily into a dough ball then sprinkle in a little more flour until it does come together, If the dough is too dry sprinkle in more water or milk, incorporating the liquid in just until the dough is easier to handle.
- Place the dough onto a greased and floured baking tray. Pat the dough into a circle shape that is about roughly around 3 cm high and 16-17cm wide.Use a sharp knife to score a cross about 1cm, or a little deeper, throughout the centre of the bread surface.
- Brush the surface of the bread dough with milk.
- Bake on the middle shelf for about 35-40 minutes, until risen and golden, and tapping its surface and underside sounds hollow. Fan ovens will likely bake faster so check at the 30 minute mark if using a fan oven or if your oven tends to bake quite quick. [We used an electric oven at 200C and our damper was baked around the 38-39 minute mark.]
- Cool the damper on a wire rack, and enjoy while still warm.
Notes
- Nutritional data: This is for guidance only and is not an exact calculation as ingredients vary.
- Flour variations: If you don't have self-raising flour, you can make your own by using all-purpose or plain flour and adding one tablespoon of baking powder and a half teaspoon of bicarbonate of soda [baking soda].
- Salt consideration: If you're using self-raising or self-rising flour from different countries, be aware that the salt content can vary as self-raising from the UK does not usually contain salt. If salt is already added to your flour reduce the salt in the recipe to ½ [half] teaspoon.
- Milk alternatives: This recipe uses soya milk but feel free to use almond, oat, or any type of milk you normally use.
- Baking time: Ovens can vary widely, so keep an eye on your damper, especially during the last few minutes. For fan ovens check the bread at the 30 minute mark.
- Storing: Damper is best eaten fresh but can be wrapped in a tea towel, or within a bread bag, and stored in a bread bin or container for a few days. Older slices can be toasted. Or freeze for 2-3 months and perhaps warm through the slices once thawed.
- Softer crust: If a softer crust is preferred wrap the damper in a clean tea towel as soon as it comes out of the oven, and cool the bread within the towel. Doing so can helps retain moisture that softens the crust.
- Golden syrup: In Australia it is traditional to add butter to freshly baked damper and drizzle golden syrup over warm damper bread especially if it has been baked over a camp fire. Alternatively, use any syrup you prefer. Or dunk your bread into a tasty soup or stew, or enjoy a slice toasted for a snack.
- Recipe notes and FAQs: Check out our recipe notes above the recipe for more useful information to help bake the best damper bread.
Nutrition
Prepared our tasty Australian Damper Bread recipe? Do get in touch and let us know how you got on with the recipe. Especially if you have baked damper over a campfire or within the hot ashes! We love hearing from you so do get in touch if you have any queries or questions. All the best, Love Jacq x
Leave a Reply